PWA and Web Push API Blog Series
- Introduction
- Subscriber
- Application Server
- Pushing Messages (this post)
Progressive Web Apps and Web Push API - Pushing Messages
Having all the foundation needed ready to go our last step is to update the subscriber with it all, and then we can push messages. We need to share the VAPID public key with the client and allow it to send the subscription to the application server. The following steps through connecting those dots and testing out the finished solution.
Update the Subscriber Client
-
In the Google Push Notification Lab project (pwa-training-labs) open up the file
/push-notification-lab/04-3-vapid/js/main.jsand replace theupdateSubscriptionOnServerfunction (it should be found on line 143) with the following code.function updateSubscriptionOnServer(subscription) { // Here's where you would send the subscription to the application server var subscriptionJson = document.querySelector('.js-subscription-json'); var endpointURL = document.querySelector('.js-endpoint-url'); var subAndEndpoint = document.querySelector('.js-sub-endpoint'); if (subscription) { var jsonSubscription = JSON.stringify(subscription); subscriptionJson.textContent = jsonSubscription; endpointURL.textContent = subscription.endpoint; subAndEndpoint.style.display = 'block'; var xhr = new XMLHttpRequest(); xhr.open('POST', 'http://localhost:3000/subscribe', true); xhr.setRequestHeader('Content-type', 'application/json'); xhr.onload = function () { // do something to response console.log(this.responseText); }; xhr.send(jsonSubscription); } else { subAndEndpoint.style.display = 'none'; } }What’s this code doing?
We’ve updated theupdateSubscriptionOnServerfunction to make request to our server that sends along the client created subscription object. This request registers the subscriber with the server which stores the subscription in memory (via the Node.js subscriptions array we created in the previous post). -
In the same file (
/04-3-vapid/js/main.js) update the variableapplicationServerPublicKey(it should be found on line 90) with your generated VAPID public key. If you don’t remember what the value is that you set from the previous post, you can try runningecho $VAPID_PUBLIC_KEYin your terminal to see it.var applicationServerPublicKey = 'REPLACE-WITH-YOUR-VAPID-PUBLIC-KEY';
It’s crucial that you use the correct VAPID public key that you generated and are using in the application server so that the push notifications go through successfully. If you find they are not working when we get to that step, it is most likely due to an incorrect public key.
Run It!
That is all that was left to do so let’s run it all and try sending our first push notification!
-
Run the application server by executing the following command in your terminal from within the
node-web-pushdirectory:node server.js -
In a separate terminal, run the subscriber client by executing the following command from within the
pwa-training-labsdirectory:http-server -p 8080 -a localhost -c 0 -
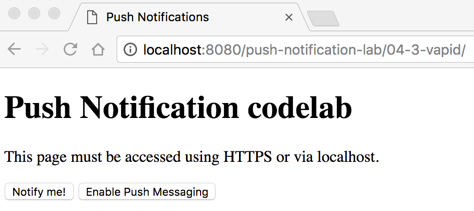
Open your browser to http://localhost:8080/push-notification-lab/04-3-vapid/ and click the Enable Push Messaging button
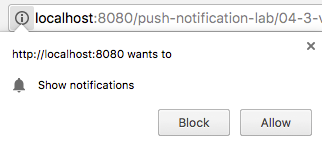
You may be prompted to enable Notifications in your browser as seen in the image below. Click “Allow” to enable them.
-
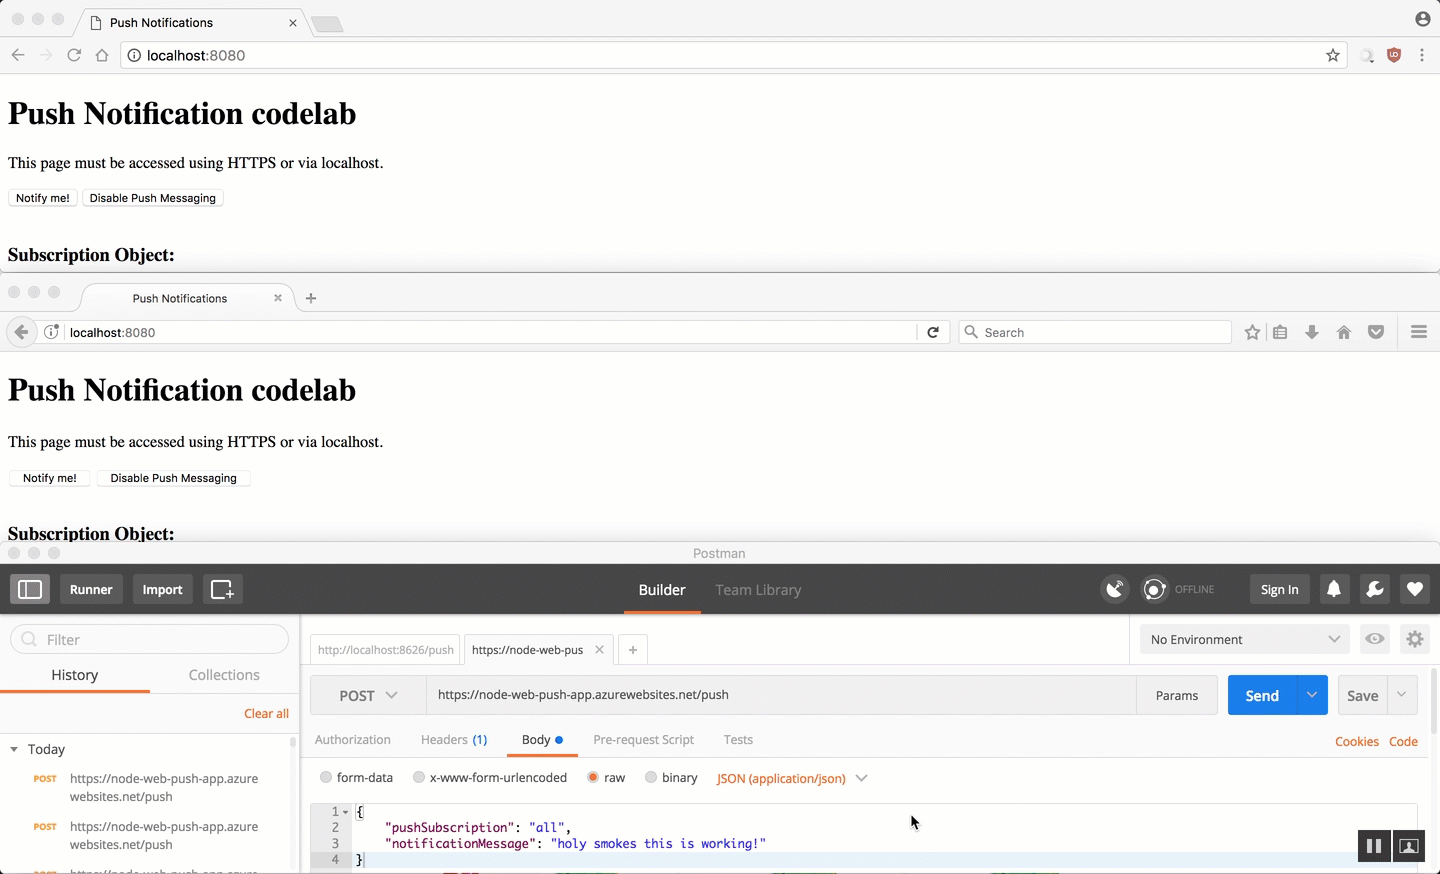
Open up a REST client (I suggest and will be using Postman)
-
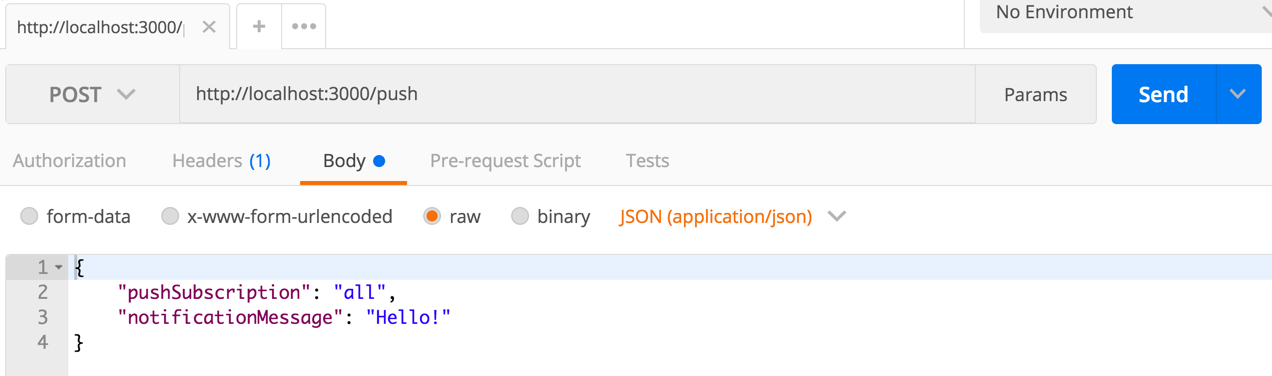
Set up your REST client to execute a POST request to http://localhost:3000/push and with the JSON data seen below as the raw body value.
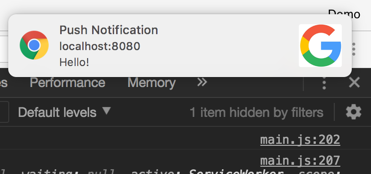
- Send the request from your REST client and you should see a pop up notification with the message of “Hello!”
- Done!
Wrap Up
We’ve completed setting up a Progressive Web App and enabling push notifications by leveraging web-push and the VAPID protocol. This is just the start though and there’s plenty more you can try out with push notifications. Check out the Introduction to Push Notifications article to learn more about customization, best practices and more!